Lesson 2 of 7 / HQ fundamentals
Set Up Your HQ Company and Team Workspace
Complete the setup interview, create your company workspace, make it shareable with a team, and save the finished session for later recall.
Begin lesson- Complete in
- 10–15 minutes, plus provisioning time
- Written path
- 9 steps
You will create a cloud-backed company workspace, understand what HQ generated, verify it in Console, and close with a recoverable handoff.
Recorded walkthrough
Watch the complete path.
Follow the recording once, then use the written steps below as the durable checklist. English captions are available from the player controls.
This walkthrough uses demo data and shows the complete recorded workflow. Use the written steps below as your durable checklist while you follow along.
Before You Begin
The Install HQ lesson is complete and the HQ workspace is open.
You are signed in and /setup has started.
You can provide basic information about your role, company, goals, and tools.
Creating a shared company may require owner or administrator authority.
Step-by-step walkthrough
- Step 1
Let setup check your account
Start or continue setup and allow HQ to sync before it checks whether you already belong to a company.
CommandRun exactly as shown/setupExpected resultHQ reports your current membership state. New users may see no company; invited users may see an existing one.
- Step 2
Complete the setup interview
Answer with your real role, company, goals, pain points, and sources of truth. You may skip the optional public profile.
PromptSend in your AI sessionProvide your name, role, and companyDescribe the company, goals, challenges, and toolsExpected resultHQ has enough personal and company context to propose a workspace.
- Step 3
Approve the company scaffold
Review the proposed company and approve the visible scaffold option. Answer the GitHub organization question for your own environment.
SelectionChoose in the interfaceSelect Yes, scaffold itExpected resultHQ begins creating the local company structure.
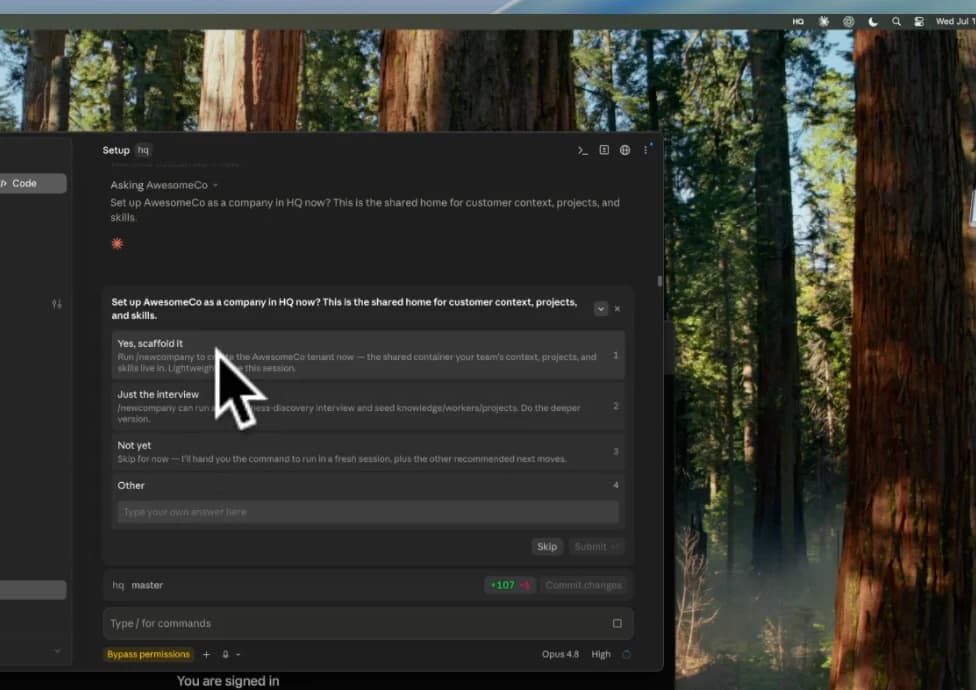
Figure 2.3 Approve the proposed company workspace.
- Step 4
Inspect the generated directory
Open HQ in Finder and review the root areas, then open the new company folder to see where shared company context lives.
CommandRun exactly as shownopen hqExpected resultYou can distinguish personal and local areas from the company folder synchronized with authorized teammates.
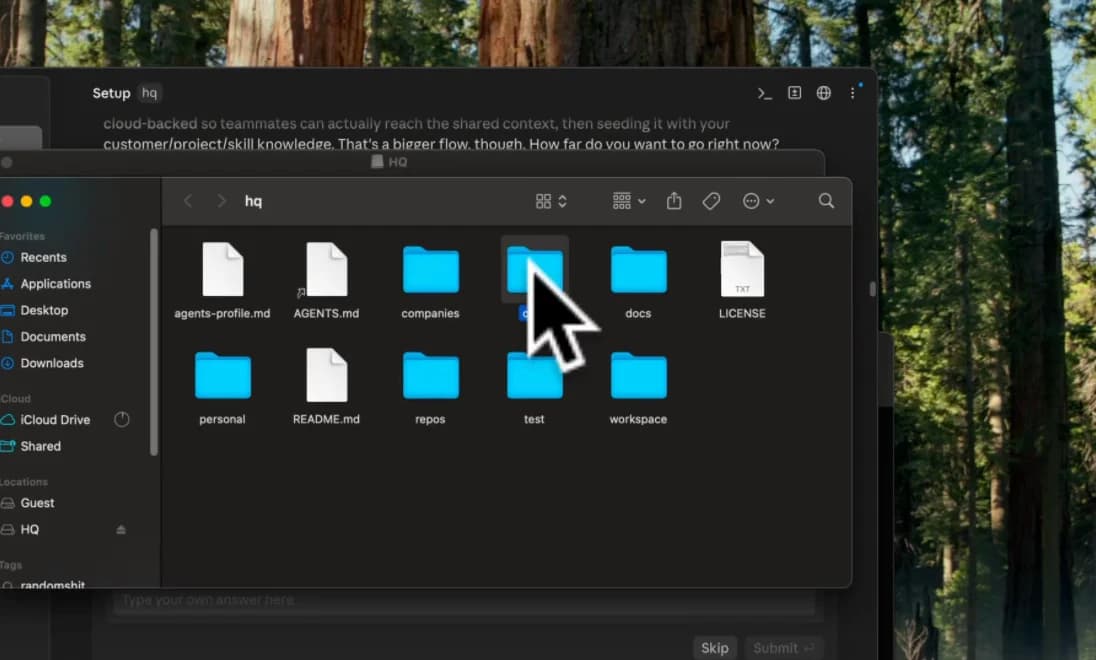
Figure 2.4 Inspect the generated HQ folder structure.
- Step 5
Make the company a team workspace
Choose the team option and wait while HQ provisions the cloud-backed company.
SelectionChoose in the interfaceSelect Make it a teamExpected resultThe local company becomes a shared workspace that can invite teammates and synchronize company context.
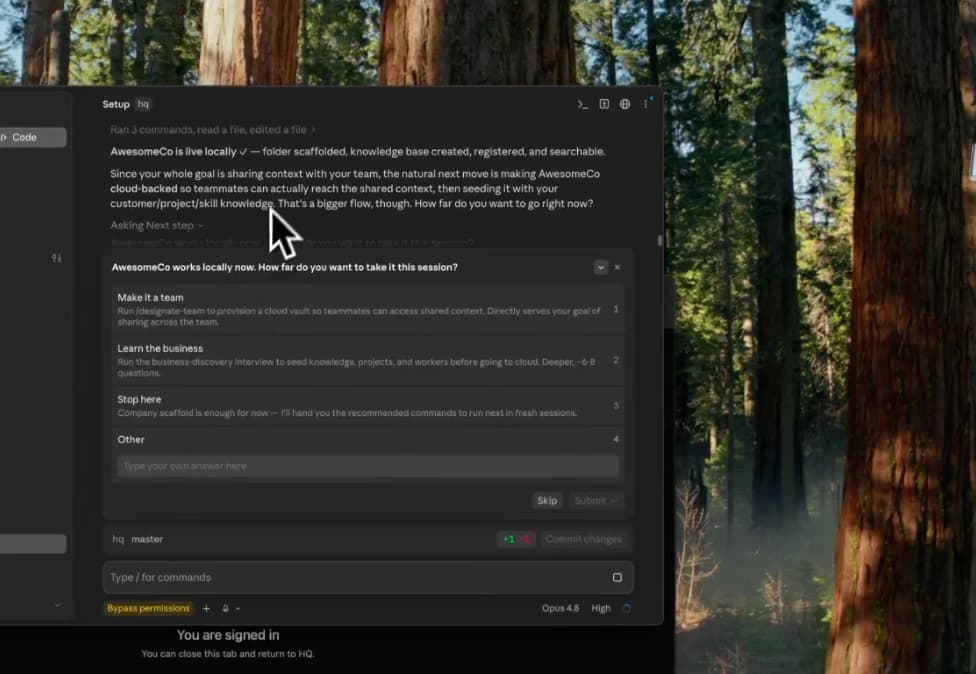
Figure 2.5 Select Make it a team to create a shared cloud workspace.
- Step 6
Verify the company in Console
Open HQ Console, choose the company, and confirm that its team workspace and Vault are available.
NavigationOpen this destinationhttps://hq.computerExpected resultThe new company appears as a cloud-backed workspace with shared HQ areas.
- Step 7
Choose what to do next
Review the suggested follow-ups, such as inviting a teammate or adding company context. It is also fine to stop after setup.
Expected resultYou understand the available follow-ups without being required to complete one now.
- Step 8
Save the session with a handoff
Run the handoff command and keep the session open until HQ finishes writing its durable summary and updates.
CommandRun exactly as shown/handoffExpected resultHQ displays Handoff ready and provides a path for resuming the saved work.
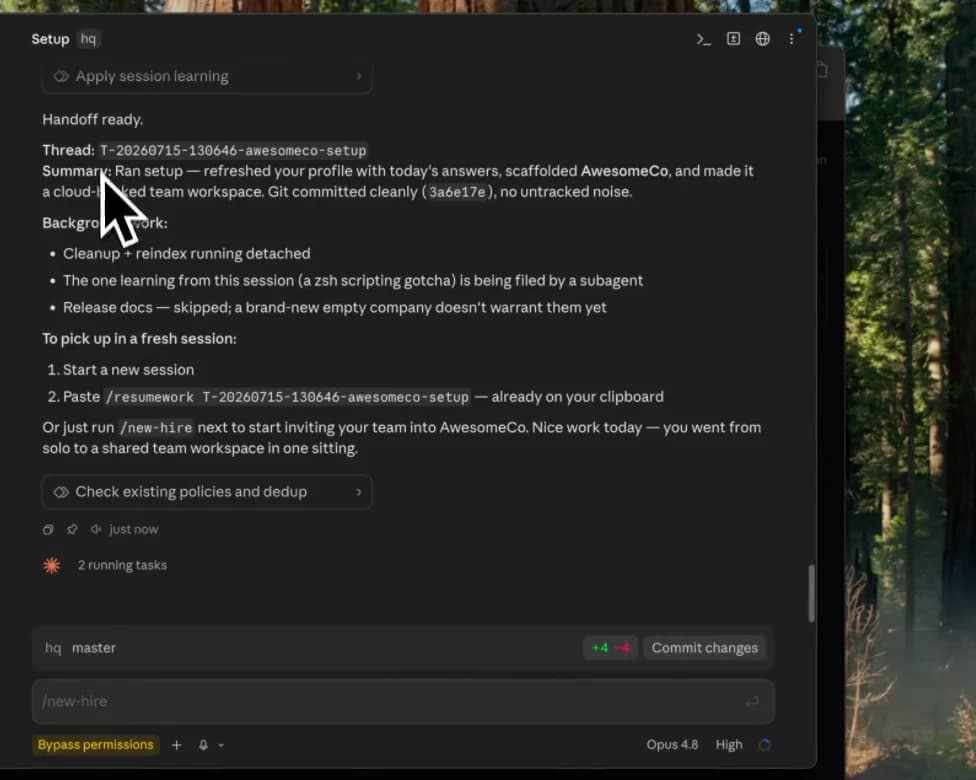
Figure 2.8 Confirm the setup session has been handed off.
- Step 9
Resume and check recall
Start a fresh session from the saved handoff, then ask HQ to summarize the work you completed.
PromptSend in your AI sessionWhat have I done today?Expected resultHQ recalls the personal profile, company scaffold, shared workspace, and available next actions.
Observable finish line
You are done when this is true.
Your company appears in HQ Console as a shared workspace, its Vault is available, and a fresh session can recall the completed setup from the handoff.